Save terabytes of storage with your DSLR footage / tips for storage options
I usually don’t blog about other people’s blog posts, but this one struck me as so important to the DSLR workflow that I just couldn’t resist sharing it with you.
Twitter is an invaluable source of useful information. It is social media at its best, and good news travel fast (you can follow me on Twitter here). Mario Feil, a fellow filmmaker from Germany, is one of the people I am in frequent contact with via Twitter, and he had this incredible idea of how to reduce the immensity of data we have to wrangle when we shoot DSLR video.

Big thanks to Mario for this simple but efficient method!
It isn’t only due to the size of the native footage that we are stuck with lots of data – it’s because of the fact that we can’t edit the native footage in its native H.264 form and have to convert it. Most editing platforms just can’t handle it because it is just a finishing format essentially.
So we follow tutorials like this one to convert the footage into an editable format like ProResLT and therefore create huge amounts of additional files of the exact same footage. You got everything twice as a result, and oftentimes the converted files are larger than the originals, depending on the codec you use.
So you will only edit the converted files but always keep the original files as they are your master files – and every converted file will have to lose a little bit of quality of course. Never deleting the native files is essential to be able to always fall back on the maximum quality that you have available.
BUT there are good news: you can delete something else and thereby save hundreds of gigabytes or even terabytes of data.
Free up terabytes of space on your hard drives
Mario Feil’s approach is as simple as it is brilliant, here’s the short version of how he does it:
When you are done editing your project (using the converted H.264 as ProResLT or other formats), you can delete or move your converted ProResLT files (or whatever other format you are using for editing) and re-open the Final Cut Pro project. Of course, the application won’t find these files as a consequence and ask you to reconnect the media.
When you reconnect, you simply refer to the NATIVE files instead of the converted files – both should have the same names and lengths, their only difference should be the codec within the .mov-wrapper.
Et voilá!
Final Cut Pro will automatically connect everything with the native files and you can re-render all effects right onto them, guaranteeing you the best possible quality from your DSLR footage while saving you possibly hundreds of gigabytes of converted data.
Should you ever need to change something about the edit later on, it should be quite easy to re-convert all the native footage into an editable format again and reconnect the other way round.
Please do check out Mario Feil’s new blog for details on how to do it, it will save you several harddrives if done right. I have just saved 400 GB from a recent project – it’s just incredible.
![]()
Storage options for DSLR video footage
By the way: I get often asked how I store my footage. Let me explain you briefly.
The rise of solid state media recording has given us many blessings, cheaper cameras without flimsy mechanics and things like higher framerates for slow-motion recordings – all of which was just impossible with tape-recording camcorders only a few years back.
The biggest downside to that way of recording, however, is that you have to think hard about how to store your footage properly. Hard disks are mechanical mediums as well and if they fail – and boy, they do fail from time to time – a lot more footage is lost than it would be with a broken tape recording. Therefore, backing up is essential.
Different people use different approaches to save their footage, but in essence, you can’t get around HDDs as affordable ways of saving your data. Many people use RAIDs, which combine several hard drives into arrays that offer increased storage reliability through redundancy. The problem with RAIDs is that they are usually expensive and often not very portable – so when on the road with your DSLR and laptop, you don’t really want to bother with a device of that size.
There are very nice exceptions though:
I also had my share of bad experiences with external hard drive enclosures. Some manufacturers build their enclosures in such a way that you can’t swap hard drives – if you do, you can’t read out the data anymore, believe it or not. Happened to me with an external Maxtor enclosure. My only option would have been to go to expensive data recovery services, and they charge per megabyte.
Another problem with external hard drives is that they change the shape and form of these things every few months, and if you produce around 1 TB of video data per month like I do, this can get annoying VERY quickly. Also, different drives have different connectors, you end up with USB2.0, Firewire 400, Firewire 800 and eSATA at the same time. Extremely tiring, with miles of wires and leads you have to carry along.
So what is the other option?
It’s a very simple and affordable alternative: an external hard drive dock!
You take any industry-standard 3.5″ internal SATA hard drive and just stick it into the dock, and it will mount. These docks are available with USB or eSATA connectors, and I prefer the latter for the most speed you can get (same speed as internal drives, actually). I just bought an eSATA expansion card for my MacPro to make it work, but USB is fine too – and some of the newer ones already support the super-fast USB3.0.
QuickPort Duo on Amazon.de, on Amazon.co.uk
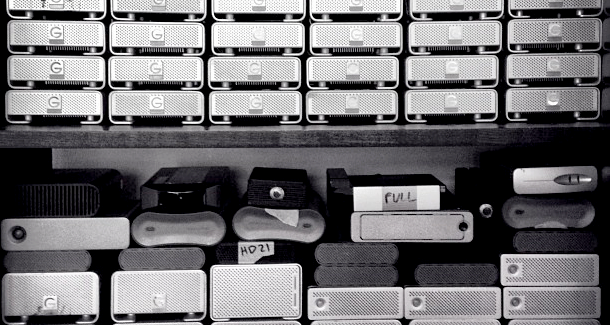
The great thing about this solution is that it is simple and very affordable. You can shop around and get any internal SATA drive you want for the dock, stick it in, format it, done. All in all the dock including the hard drive will cost you less than one external hard drive, but after you purchased the dock, you only need to purchase new hard drives as you produce more and more data. I have a closet full of hard drives now, every single one neatly labeled and numbered, with a database on my computer telling me on which drive I can find which recording.
I use the QuickPort Duo that gives me the chance to connect two drives at the same time via eSATA. One of them is my backup, so I mirror the contents of one drive onto the other. When the mirroring is done, I edit from one of the drives. If one drive should ever fail, I still got the other drive with the exact same content – I could continue working right away.
Of course some people think it is not a sturdy solution like external hard drives are – that might be partly true as the hard drives aren’t protected when they are sticking out of that dock. However, there are protectors available for this, and I have never ever had any problems with this solutions in the almost two years I have been using it now. It’s also quite portable and the docks are so cheap that you could buy one for every location you frequently commute to.
I currently use countless Samsung 1TB and Western Digital 1.5TB drives with my dock, and not a single one of them has failed. My personal opinion is to stay away from Seagate drives for now as they had massive failings some years ago with some firmware glitch (they have resolved that issue, but they haven’t regained my trust yet).
Western Digital HDD on Amazon.de, Samsung HDD on Amazon.de
Western Digital HDD on Amazon.co.uk, Samsung HDD on Amazon.co.uk
As I said, different people use different solutions. I know many people (like Mario Feil, for instance) who love the Drobo, a NAS device that offers automatic backup and data migration and a lot of security for your data. The downside is that it is slow and bulkier than my solution, but probably even more secure.
What do you use for storing and backing up your data? I am very eager to hear what other people use as people should be aware of all the good options. There is hardly anything more important than data security.
We should never forget that what we produce will not be here forever, but we can at least try to make it last as long as we can. So what’s your solution?
Related Posts
Cam Busters – HDSLR & AF101 Workshop Tour through Austria & Germ... June 18, 2011 | Nino Leitner
Canon EOS C300 – Review & short film December 9, 2011 | Nino Leitner

Woodclass – “4K Cinematography Workshop” in Germany in August... June 14, 2013 | Nino Leitner

Part 2: Full HD ‘digital zoom’ using crop – a viable option? HD video with... April 26, 2010 | Nino Leitner
Tour de Cure – a documentary series about an incredible effort to find a c... September 15, 2011 | Nino Leitner

BVE 2014: Talks about storage workflow with G-Technology... February 23, 2014 | Nino Leitner
Cam Busters Workshop Tour – Wrap up September 22, 2011 | Nino Leitner
Goethe-Institut Schools: Partners for the Future [Image Film]... September 17, 2010 | Nino Leitner

-
You really should check out Adobe Premiere Pro CS5 – native, online editing of H.264, R3D and a host of other formats. No conversion to intermediates needed. Give the demo version a drive – you might be pleasantly surprised!
-
Yeah, he is right… Premiere Pro is great for DSLR footage…
But if you are using After Effects or Premiere Pro (PRE-CS5) You can use the same kind of workaround for relinking the proxy footage.
If you want to try it out, load up your project make your edits with the ProRes footage, or whatever you use… and then close the project, move the footage, and then open it back up. Then you can use the relink, or reload footage after you right click on the file, and you should be able to reload the old DSLR footage.
Although, I have had some issues with AE crashing with the native EOS codec format Canon uses… (only AE CS4)
-
Nino, thanks for a great post.
I currently look forward to finding my solution to storage problems and it helped me a lot. Well, I am not sure whether it really makes sense to get back to H264 and getting rid of ProRes files. What about throwing away your source footage after conversion? Storage is cheaper than time and I think in a long time scale you would benefit having slightly more data (keeping ProRes files vs keeping H264), but not being forced to reconvert.Can you give me more details about this mirroring solutions using a dock? I understand that you simply connect 2 docks at time right?
Thanks,
Paco -
Presently using the Sony files to PremierePro and FCP. Backing up all on iOmega, which would present some of the difficulties that you cite if things went terribly wrong. Have been wondering about the HDSLR materials and specifically how you people handle two channels of 48Hz sound????
In this age, data management is vital. Like the best vault for film negative.
Film. Remember film??
-
Avid Media Composer also edits dslr footage natively along with most other formats. I know its expensive (as much as adobe master collection) but its worth it.
-
Great post! Thanks Nino! I was leaning toward something like this, so your post came at the perfect time.
Also, the source switching technique also works for editing hi res video on a slow computer. You can edit in 720, then switch it out with the highest quality you have for final export. Works great.
-
I am surprised at how SURPRISED everyone is by this… has HDSLRs really brought that many noobie/inexperienced filmmakers to the industry?
What the blog post refers to is a simple offline/online edit which any professional editor will do ALL the TIME when dealing with footage not suitable to cut natively (essentially in every scenario/format save for DV).
ProResLT is SPECIFICALLY designed for offlining and should not be used as a mastering format WHATSOEVER. Let alone should anybody be transcoding from the raw H.264 to ProResLT and then into (what they think) is a higher ProRes or QT codec. Once you degrade with lower bitrate compression you CANNOT get it back.
I don’t mean to come off like a troll but it worries me sometimes how many people who call themselves “filmmakers” are out there just following tutorials or figuring things out as they go. The web is degrading the quality of work out there – especially since people think that just because their footage looks good in a 853×480 box on the web that they are following a proper workflow and know how to edit.
If you want to learn and educate yourself about post-production, there are plenty of books written by very talented editors at any local bookstore.
-
You need to watch the DSLR shootout on Zacuto’s website. In the latest episode they compared the original H2.64 files to the converted Pro Res files. The Pro Res files looked way better than the original files. Something about converting to 4.2.2 makes them stand up to grading and colour correction too.
So… don’t go deleting your pro res files. In fact, don’t delete anything.
Your Original H2.64 files are your rushes… your footage. Convert to Pro Res and then back up somewhere safe. Edit using Pro Res files or even Proxies (made using Magic Bullet Grinder).
I wouldn’t delete a single file… ever. Drives are cheap.
-
As some others have mentioned – they do talk about the benefits of converting to ProRes in the Zacuto shootout (toward the end of part 3 I think) but it is easilt the LEAST clear part of the entire project, and is quite brief compared to everything else they touch on. Philip Bloom himself mentions in the video that it doesn’t make a whole lot of sense technically, but the stuff just looks better when converted to ProRes first. BUT, on his own website he has a post about how excited he is to try Premiere with native files – and no follow-up.
So I’m STILL looking for info on this. On the one hand it doens’t seem to make sense that converting will help – I mean any conversion is a generation loss, right? But on the other hand, I can also understand how converting to 4:2:2 could give some “overhead” for better processing/color correction.
I still don’t have CS5 so I can’t test this myself, but I’ve heard lots of speculation, and very little solid info… anyone out there have any experience with these two different solutions?
Thanks for the article!
-
So I had a little time to run a test with my T2i. Posted a video, can provide stills. Video is 1080p can be downloaded.
There is a very slight difference but I can really only see it when I layer the clips and then switch on and off. I didn’t push the color correction all that far.
-
Yeah – I couldn’t see much difference without compression either, though to be honest. I’ve only done a couple of projects so far and all of those were done with ProRes. This test was enough to convince me to try a “native” project next. So far Premiere CS5 on my MacPro with GTX 285 handles the footage pretty well, although things like scrubbing or playing in fast reverse/forward aren’t nearly as responsive as with ProRes. We’ll see…
-
Not sure if anyone is still checking this but I had some time to play with Premiere CS5 this weekend.
Honestly, I ended up a bit disappointed. I’ve never had a problem with Premiere per se, just been using Final Cut since Verson 1 so I’m used to it (before that it was Premiere 5 on mac, but in the days of DV, FCP was clearly boss).
Anyway, at first CS5 seemed just fine working with the h264 footage from my t2i. I have a mac pro 8-core 2.8ghz with a gtx 285 gpu.
But once I got into a groove with editing, I found the native footage to not be responsive enough for how I edit. Once I get going I move pretty quick – I like to able to play, stop, reverse, fast forward, pause, frame advance etc really quickly with no lag – like in the days of tape editing!!! But with the native footage there tends to be a slight pause between when you press ‘play’ and when the clip starts playing. It seems it needs to buffer a bit before it plays. (This is at 1/2 quality playback).
Sadly this is a dealbreaker for how I work – I just got totally taken out of my groove because of these delays. I ended up going back to the ‘old’ way and converting to ProRes first.
It’s certainly the best I’ve ever seen a program work with h264 natively, and the fact that it can edit it without much trouble is impressive. CUDA is exciting stuff, and it isn’t really a lie to say that CS5 edits natively. However, it isn’t the same as using something like ProRes… it works, but it isn’t as responsive.
For certain things that need quick turnaround native editing will be awesome.
But for the way I work with my SLR, which is less run-and-gun and more slow and steady, I’m gonna stick with ProRes – even if I DO work in Premiere (which I may continue to do, because a trip to After Effects is inevitable).
-
-
-
Why not get the new Avid5 straight away? No conversion necessary any more… 🙂
-
Nino, thanks for the great post.
Do we know why a prores looks better then the h.264? It sounds like the photoprint looks better then the actual negative. That is also my experience. h.264 looks often grainier and sometimes aliasing disappears when converted to prores. Any clue?
Keep up the posts here. -
One more thing, do you have edited with such a HD station in USB? Are there firewire 800 versions out there?
-
Great blog.
We’re filming a feature length film right now with the Canon T2I and I love your blog for info.
I picked up a DockMaster after trying to figure out what to do with all my old Hard drives after upgrading all my computers.Fantastic!
-
CS5 don’t need convertion to proressLT anymore. you can edit native H.264 files.
-
Thanks for the info. You are doing a wonderful job communicating your message. Keep up the good writing.
-
Nino, are you editing with drives in these docks, or just copying material over for archiving?
-
Nino, very interesting solution, thanks much for posting.
-
-
Brilliant solution to a problem I guess many are having. I just spotted your tweet in time, as I was about to spend about £200 on an external WD esata 2tb drive, should be able to get the port and about 3tb for that price. I love the plug in and use, unplug and store aspect. brilliant.
-
Nino,
Thank you for posting this. I have been looking for a better backup solution then the one I have (which is two usb lacie drives). This is faster and cheaper, really appreciate it. If you find a good way to store them please let me know, I could see how that could be a problem.
Michael
-
Haha, I feel like such a fool for not having thought of
this! So simple. Anyways right now I’m editing with Premiere CS5
with native support for H264 files so no need to convert. Only
works for short projects though. -
Here is my solution. First of all, I only save the card data and (sometimes) document the settings in a textfile, so I can always re-produce the ProRes or any other edit codec files.
I have two RAID-1 FW 800 LaCie’s. One is for projects I’m working on (speed and space), the other for storage (safety). The great feature about these LaCie discs is that you can replace both discs. If it is full I can pull both discs out and replace them with new disks. Both old discs are stored at different locations. A HDD dock is great to read the old discs.
-
Hey Nino,
can you recommend any esata cards for the MBP? I have the old 2007 modell.
Thanks,
Markus


Comments